Introduction
Browsing my local antiques shop one day I spied a nice looking camera, a folder, in a display cabinet otherwise filled with colourful die-cast toys. It was hidden away at the back, I looked a little closer….That’s disappointing! Unmistakably a Perkeo, and I already have one of those.
I love my Voigtländer Perkeo I. It may have been entry-level with its Vaskar triplet lens and basic Prontor-S shutter but it gave me my favourite first-roll set of negatives ever. I’d love to take this one home, but I can’t start having duplicate cameras.
Something then caught my eye – “Color-Skopar“. Now that’s interesting, maybe I can justify a lens upgrade. I asked for the key to the cabinet.
Holding the camera and testing its functions I spotted something even more interesting…”PERKEO II” imprinted on the top plate. It looked to my eye exactly like my Perkeo, but this was version 2, and 2 means better…right?
Disclaimer: As you will know from my introduction to this site this will not be a technical or scientific review. Just my genuine impressions of the experience of shooting with this camera, how it makes me feel as a photographer and how it is to live with.
For a history of the Voigtländer Perkeo see: https://camera-wiki.org/wiki/Voigtl%C3%A4nder_Perkeo_(6×6)

Appearance
You can read some of the history and context around the Perkeo in my first review. It’s worth noting the “II” isn’t really a successor, more an upgrade & higher tier offering. Both were produced concurrently from 1952 – 1955.
For this review I will focus on what’s different, and the simple answer when it comes to appearance is….not very much at all.
It’s built with exactly the same robust quality, this is a camera that feels engineered rather than assembled. While small, it’s not an exceptionally small 6×6 folder, there are others comparable. And this “II” is essentially exactly the same size as its predecessor.
Everything from the chrome finish to the quality of the door mechanism (pinch two metal buttons on the inside of the door to close) feels exceptional quality.
The front has the same plain, central door. The leather finish is the same quality, not a sign of aging, lifting or peeling. There’s the same red-window on the back to see the frame numbers on the film backing, covered by the same internal (lovely!) cover which slots into place by turning a knob on the back.
The top plate has the same layout too – near-central cold shoe with a small viewfinder and film advance knob clustered neatly to the left as you use the camera. Even the same shutter button to the right, and further right the same tiny window related to the double exposure prevention.
At risk of boring readers of my Perkeo I review even the door mechanism is the same (very nice and quality!) pinch top and bottom approach for the catch. The base plate?…you guessed it, pretty much the same with tripod socket and (lens) door release button.
So, fans of spot the difference, what did Voigtländer actually change here?
Well they did put “PERKEO II” branding on it, I suppose that was the absolute minimum really. Better though, they listened to my feedback (maybe time travel does exist!)…the branding is now set in the chrome top plate, recessed and painted black, including that iconic “Voigtländer” script just like on my Vito.
It’s a small change but it does help the camera feel ever so slightly less generic and more premium, +0.5 points for this change – well deserved.
There’s also a mystery metal lever on the back of the top chrome, more on this in the next section.


Controls
As with the original Perkeo, most of the controls are clustered around the front of the lens. From front to back on the lens assembly you have…
- A focus ring with a ~270 degree throw. Nicely damped and precise, my example is 1m to infinity with a hard stop at infinity and a little bit of extra travel past 1m. We also have the familiar markers for long (circle) and mid-distance (triangle) zone focusing distances, Depth of field aperture numbers are in the usual place on the front, albeit small.
- A shutter speed dial, a slim metal ring with a block line on the front which should be aligned to the desired shutter speed on the side of the lens assembly. Note there are no “stops”, the dial turns freely and can be left between speeds. I never recommend doing this, check an exact speed is selected.
- A shutter cocking lever, just next to the speed markings a plain metal lever. This should be gently pulled to a stop (~30 degrees), after a shutter speed is selected. It will flip back when you fire the shutter.
- A shutter mode switch, “X” is the standard setting, with “M” specifically to support the use of “M” class flash bulbs which fire before the shutter opens.
- An aperture select lever by the bellows, small but simple enough to operate
So, spot the difference fans, is this where Voigtländer made all the changes? Not quite.
We do have a different shutter, a high end “Synchro-Compur” setup to be exact. It’s 9 speeds (+Bulb) settings slightly surpass the 8 on offer in my Prontor-equipped Perkeo. Much more importantly to most photographers is those speeds now top out at a best-in-class 1/500s. The basic shutter could do 1/300 which isn’t exactly slow, but if you want to use higher speed (ISO400+) film in bright daylight that difference will feel huge.
As a trade-off, we lose the self-timer of the Prontor but for me personally, this is a good trade-off.
It’s worth clarifying though, both versions of the Perkeo were available with a range of shutters, so this comes down to the individual camera you find, rather than a “II” improvement.
On the top plate you have the same shutter release, for after you’ve tensioned the shutter and the film advance knob.
This brings us to the biggest difference exclusive to the Perkeo II. We now have a far superior double-exposure prevention system with automatic frame counting and a very tight frame spacing.
What does this mean? Well a few things…that little window on top no longer just shows an arrow (wind or take photo), it now shows the actual frame number. In theory you may not even need the red window on the back anymore. Cutting-edge technology in 1952!
The basic principle is below but in this case it’s worth reading the manual:
- Flick the lever on the back of the top plate to the right to reset the frame counter (numbers in the top plate) after you load the film
- Advance the film to 1 (in the classic red window)
- Turn the lever back to the left to engage the film transport interlock
The frame spacing is so tight you might even get 13 photos out of a 120 roll (normally 12 for 6×6)
The viewfinder is as small as before making it difficult to see the edges of the frame.
My only frustration was this being my first camera in meters rather than feet for focus. It’s personal preference but using many UK-sourced film cameras I’ve trained my brain to zone-focus and guesstimate pretty well but in ft. If you choose to use an accessory rangefinder, always worth checking the units match to save conversions.
As you would expect, everything works well and feels genuinely quality. The improvements are modest but valuable.


Loading and Unloading
There’s not much variation in loading 120 medium format folders, you can read more in my earlier reviews.
Here everything is relatively easy. To insert your empty spool on the left, just as in the “I” you pull forward a hinged tab on the bottom, add the spool, lift the rewind knob and push it into place.
The fresh spool with is now even easier to insert, simply push this into place, no tabs at the top or bottom.
As usual, pull the film leader (tapered edge of the roll) across the chamber, keeping it tight at all times, and insert it through the empty “take up” spool. Give that spool a couple of turns with the top plate knob to ensure the film is tight then close the back.
As we discussed in the controls section, this is where the interlock comes into play.
Unloading is even easier. Once you’re done with a roll keep winding the film all the way until the last of the film crosses the red window (far beyond the last frame) then open the back and stick the film end down tight with the ready-to-go strip at the end.
Because 120 film isn’t sealed away in a light tight plastic canister like 35mm film all of this should be done in subdued light, else you might expose the film to some light and ruin your precious images. The backing paper should be completely lightproof, but it’s always better to be cautious.
Overall the loading process is straightforward, but don’t forget the film interlock, else you might damage that complicated mechanism.


Shooting Experience
The Perkeo II is, in many ways, a typical medium format folder experience. Controls on the lens, well spaced and quality here, with some kind of double exposure prevention system.
advance film – set aperture – set shutter – focus – compose – release – repeat
As you would expect from this class of camera we have no light-meter or rangefinder, this is manual photography at its finest. If you like, you can always use an app or external light-meter or an accessory rangefinder to help.
Just like my first Perkeo, at its heart this is a slow and steady big depth of field camera at heart. Landscapes or perhaps pre-set street photography. The format does its part, only 12 (or 13!) photos per roll, but the camera and its controls also encourage you to take your time and think about every scene, every camera setting, every movement.
My complaint about the viewfinder remains, it’s a bit too small for my liking as a glasses wearer.
I’m also not too convinced by the, admittedly very clever, frame counter. I thought I would like it, I wanted to like it but…I’m not sure. I’m used to that little red window, I quite enjoy how “real” and connected the medium format experience is on these basic folders.
Sometimes it’s how basic a camera is that makes it fun. Moving paper & film by hand and watching it pass by in a little window….there’s something special about it and I missed it.
If you appreciate the convenience you may find this a massive value-add. For me, on pure manual photography experience, it’s -0.5 compared to the original Perkeo I’m afraid.
Gallery
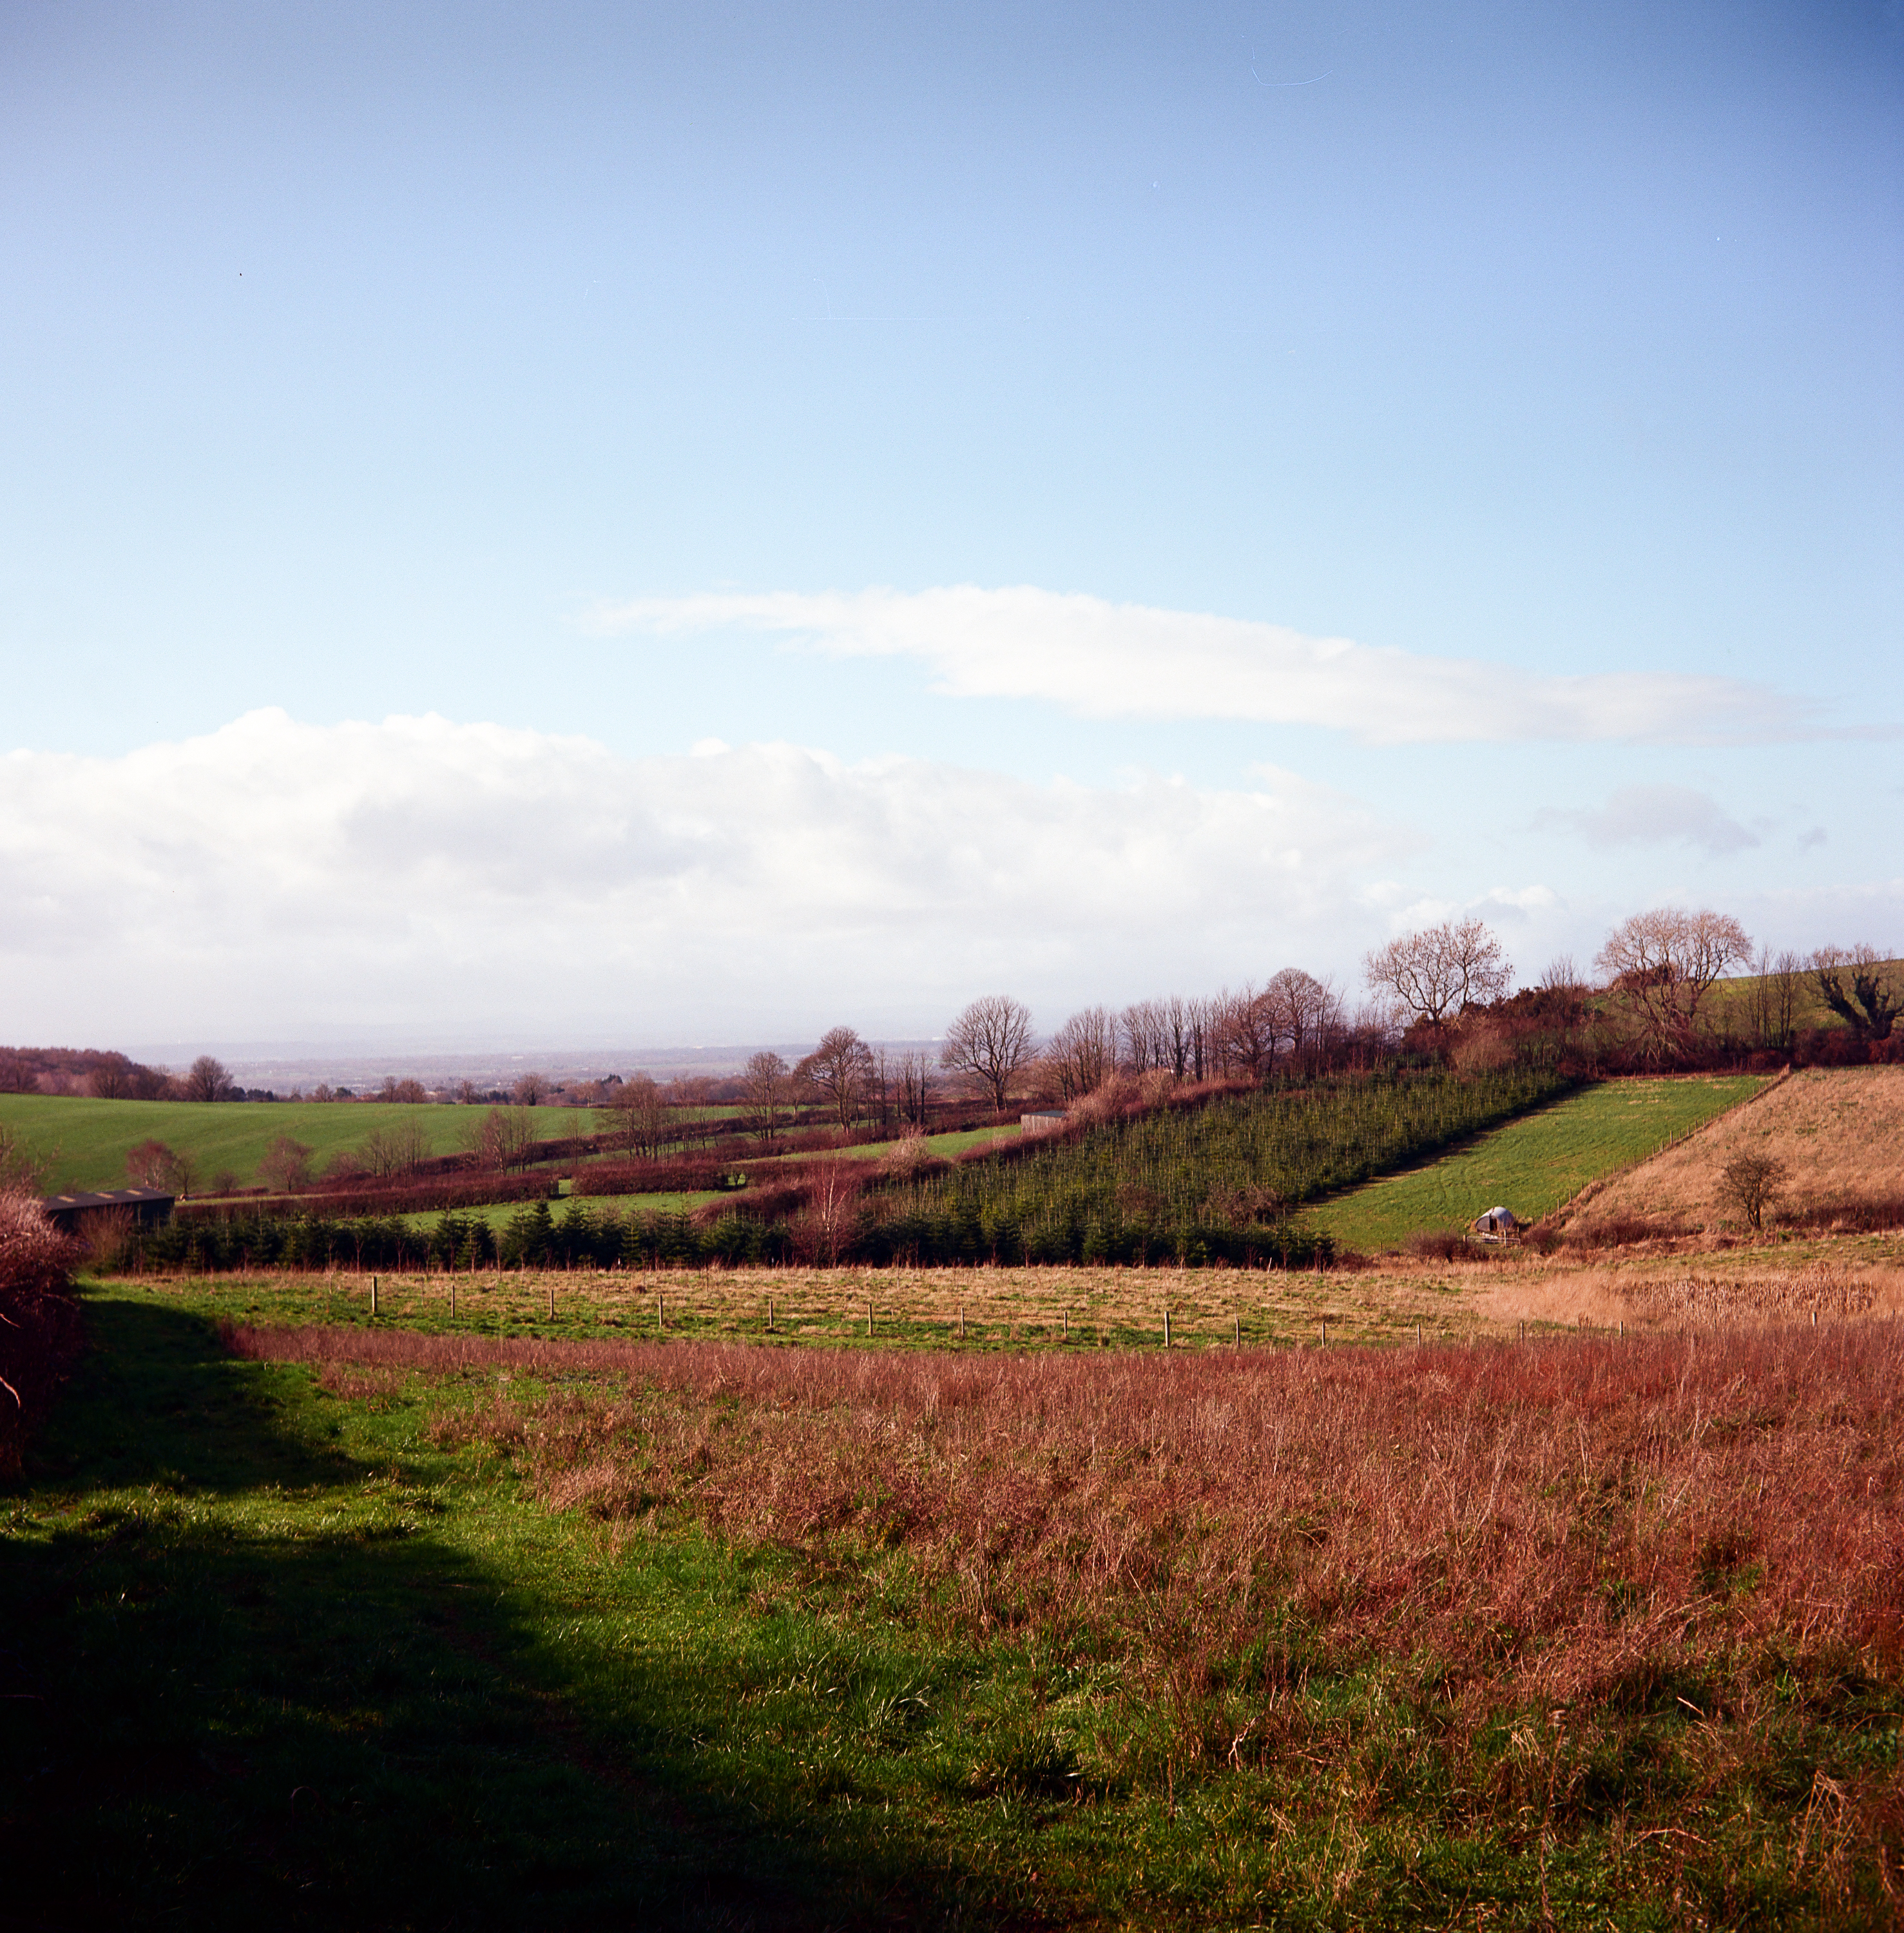
All the photos below were taken with my Voigtländer Perkeo II.


Reliability
Disclaimer: Every vintage camera is different, and the condition of my specific example will likely differ from yours.
Everything from the original Perkeo review holds just as true here…it’s a brilliantly engineered camera, solid and confidence inspiring.
The usual 50s-folder weak points of the bellows, especially with a side opening door, apply as do the positives of no light seals to decay and no rangefinder to go out of alignment.
The Synchro-Compur shutter is high-end, and well proven on cameras from all brands. Timings, and slow speeds especially, are always a risk without a CLA but this is no more or less of an issue here than any other half-century old camera.
Gone is the self-timer, so one less thing to break (as they often do). In its place we have the impressive but delicate and complex frame counting system, something that could very well fail with age or be damaged by improper use.
Lenses
While the original Perkeo came with a choice of lenses, on the “II” Voigtländer pre-selected the highest end offering, a 4-element coated Tessar‑type Color‑Skopar 80mm f/3.5.
We already know how well that design can perform on the smaller 35mm format, so how does it fare on 120? Very well it turns out…
At f/8-f/16 this lens is as sharp and contrasty as you could want for any reasonable print size. You’ll be running into film grain on most stocks before you worry about the lens. That said the rather impressive, entry-level Vaskar was equally brilliant and to be honest for high depth of field work there isn’t a strong case to pay the premium
Although not included in the gallery for this review, I did manage some good guesstimated focus portrait shots. This is where the Skopar can show us what it has to offer, close focus sharpness is exceptional, and subject separation (helped by the format) stunning. Bokeh is good too, if a little busy.
Vignetting is quite well controlled and, while corners do get slightly soft, it’s not a bad performance.
My reaction wasn’t “wow” seeing the scans as much as my first Perkeo, but I think that’s just a testament to how impressive that camera/lens is. Variables like the subject and lighting also make it not quite a fair comparison, in the right conditions this Skopar will be an amazing lens.
And that, I think, is the point – This Skopar is a better lens for sure; it’s just that on many days in many circumstances, it’s entirely possible the cheaper Vaskar-equipped Perkeo I will give you 95% of the performance. Given the price-premium Skopar variants can command, you may find the better value is elsewhere.
Whichever Perkeo you choose though this is still a jacket-pocket camera which can give you beautiful 6×6 landscapes on a sunny day. It can’t be anything other than, highly recommended.

Who’s It For
- People who want the convenience of a proper frame counter with the experience of a folding camera
- People who want a portable camera for 6×6 landscape photography
- People who appreciate camera engineering and design
Conclusion
Concluding this review is difficult, on the one hand I love my Perkeo I, and this is essentially that same camera with some added extra features. On paper that makes the Perkeo II the better camera.
The thing is though, I’m not sure I did enjoy it more for any of its extra features. I missed the simple authenticity of the little red window. The Skopar is a truly brilliant lens by any standards, but I expected it to be. I wasn’t impressed in the same way as I was with the Vaskar, a lens punching well above its weight producing better results than it has any right to. The Skopar is better; in fact, it’s amazing. I’m just not sure it’s better in a way that matters for a camera like this.
For high depth of field manual photography, honestly I would save my money and pick up an entry-level Perkeo. If you want to do shallow depth of field & close up work, or you love the convenience of a frame counter then this will be a fantastic camera for you.
The Perkeo II is one of my favourite cameras out there. In the world of car buying, it’s often said the best value is found in the base model; adding options will get you the “best” car but the worst value. The same is very true here, the Perkeo II with Skopar is absolutely the better camera, but for my money…I’d grab a base model.
Looking for other reviews, check them out here.
Ready to find your own forgotten camera, check out the guide.
Ready to get started learning manual photography, we’ve got a guide for that too.
